iOS Integration
Overview
The Voice Capture SDK comes with a Swift interface for iOS integration. This chapter will outline the requirements for integration, how to operate the developer demo program, and which parts of the demo source code corresponds to the general integration tasks outlined in the Application Design chapter.
Integration Requirements
The Voice Capure SDK requires microphone acess to be enabled:
Minimum Requirements: iOS version 9.0, Swift 4.
Demo Operation
The VoiceCapture SDK comes with a small developer demo that is intended to show how various options work. The demo allows developers to rapidly test various combinations of settings to determine what they need to adjust to meet their own application’s requirements. The demo is not intended to resemble a finished product and provides the subject with many options that should not be accessible to an end-user. Source code for the demo is provided within the SDK installer.
Home Screen
The Home page (Fig. 5) for the VoiceCapture demo application contains basic information related to current properties a button to begin the voice capture task.
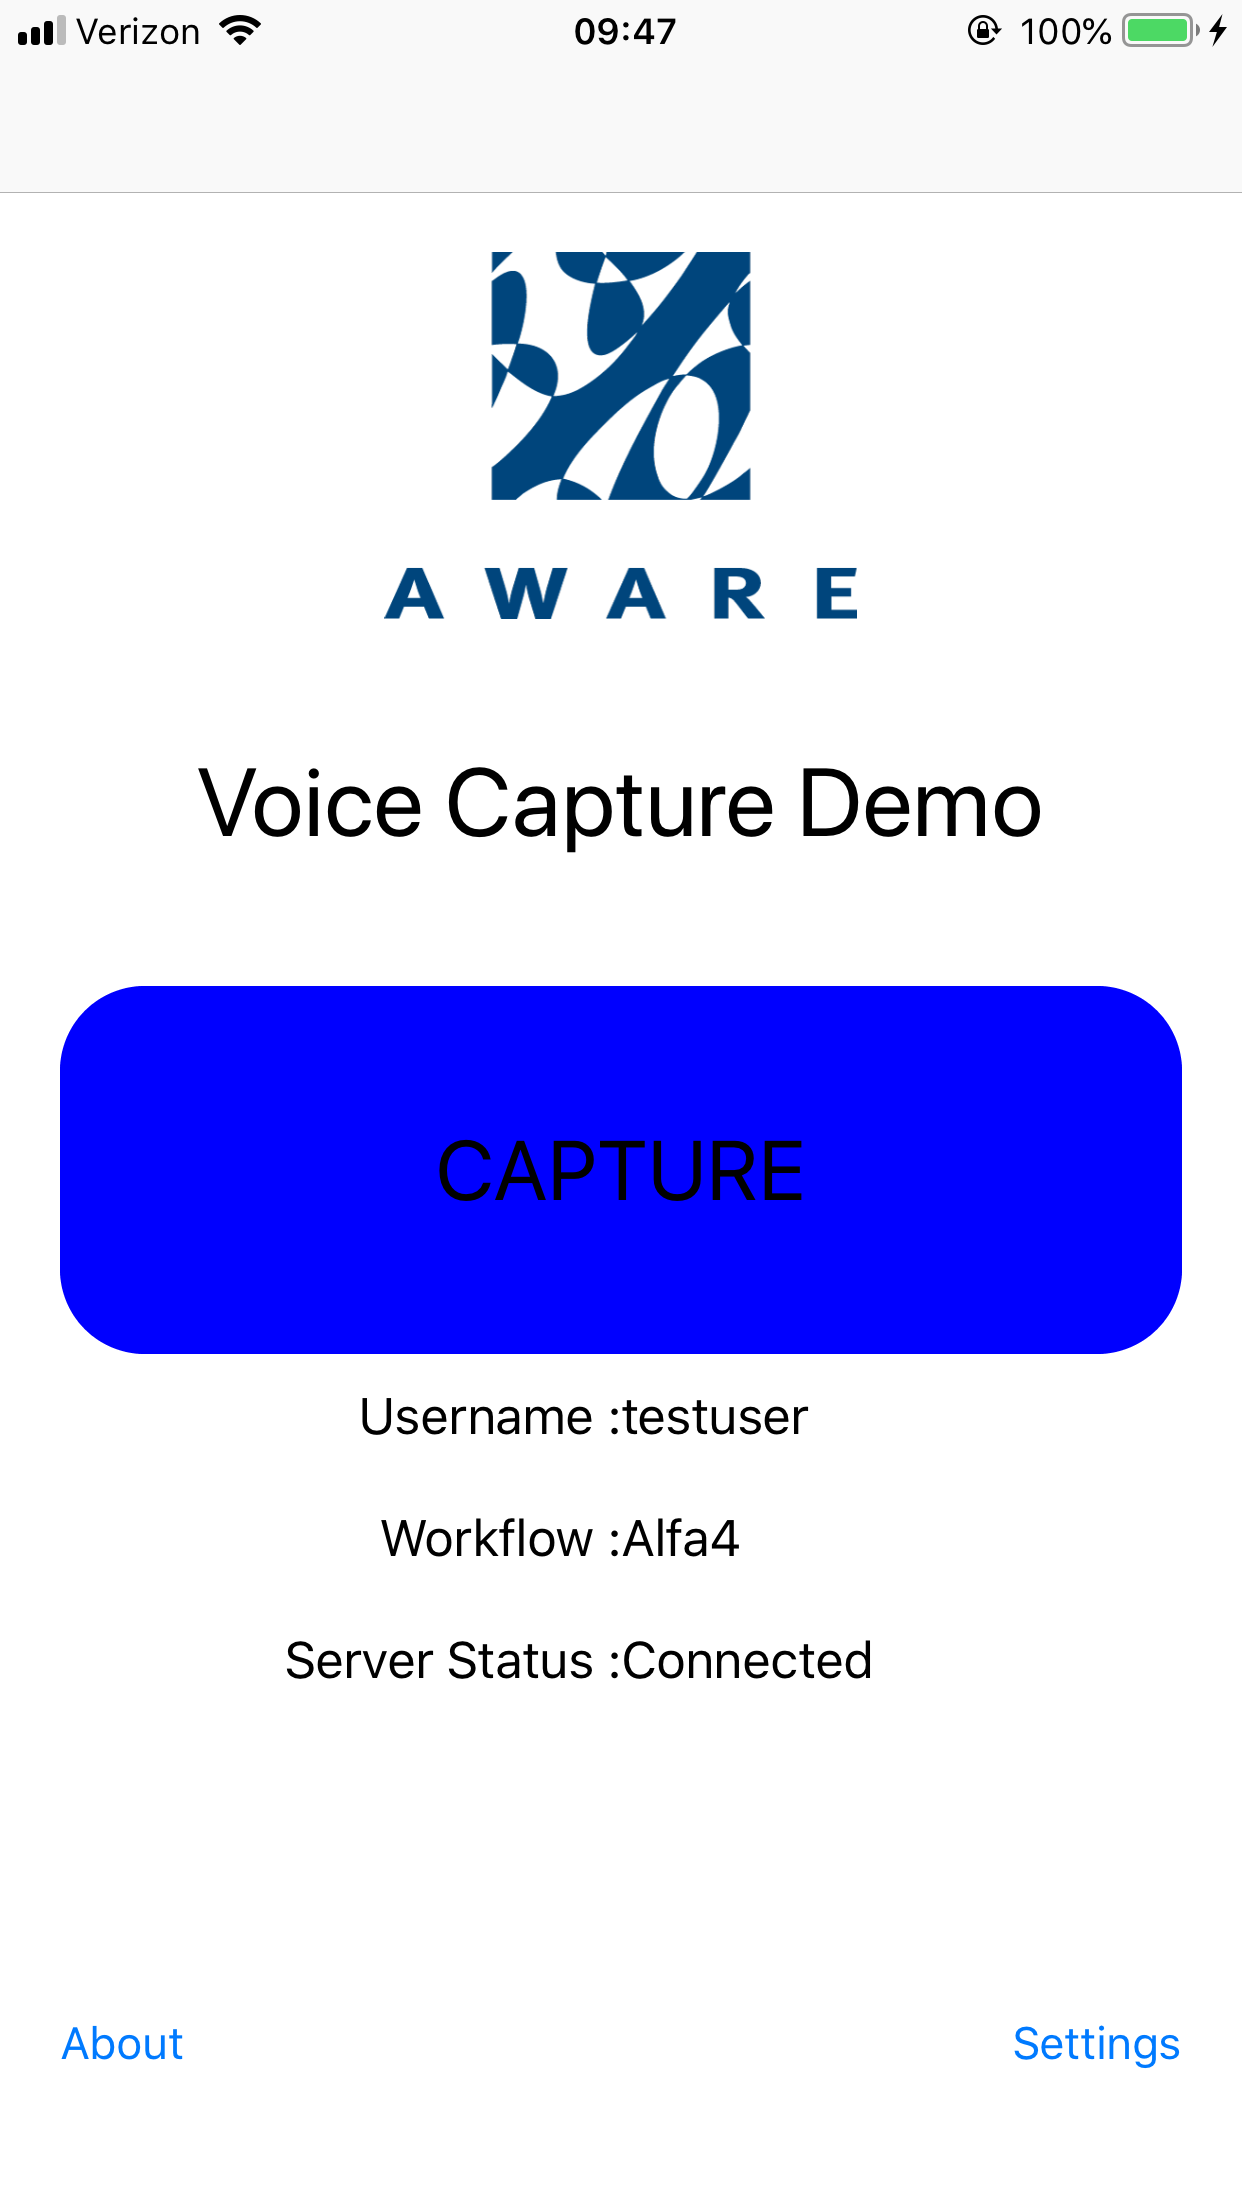
Fig. 5 Home Page
- Capture – Perform voice capture and liveness detection.
- Username – Operator identifier.
- Server Status – Indication of server connection.
Settings Screen
The Settings page (Fig. 6) allows a developer to select parameters to test with. The options in the demo program are:
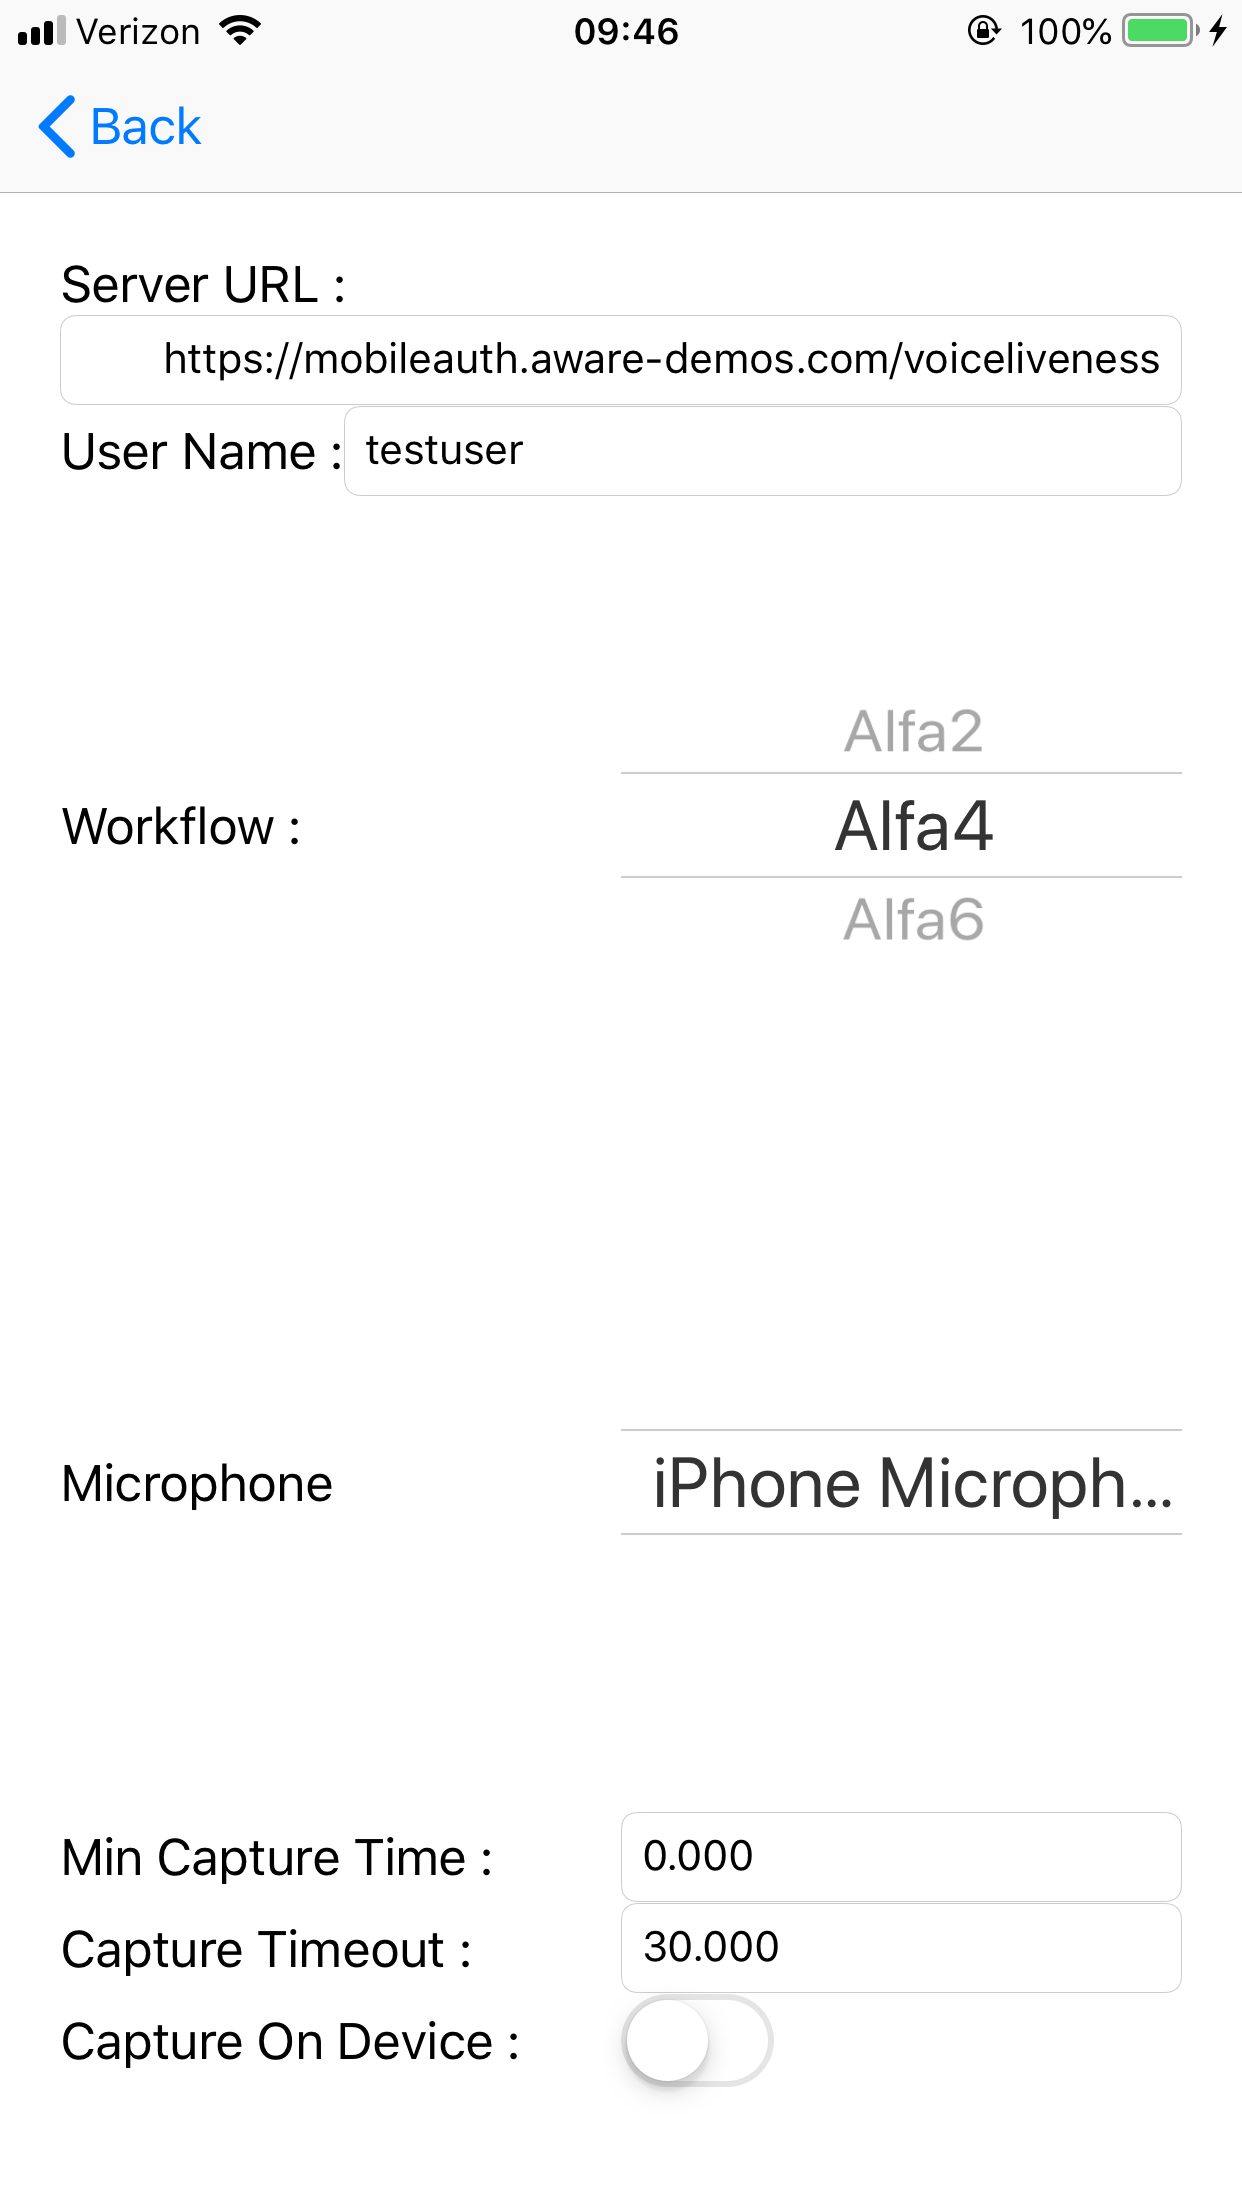
Fig. 6 Settings page
- Username – operator identifier.
- URL – Specify the VoiceCapture back-end to use for processing collected voice data. Note that this is not a property of the VoiceCapture SDK, but a feature of the application for easy testing.
- Capture Timeout Limit – A double value indicating the maximum duration in seconds for attempting voice capture before aborting the Workflow. Set to 0 for no timeout. Default is no timeout.
- Workflows – Adjustable properties for Workflow Objects.
- Minimum Recording Time – A double value indicating the minimum amount of time to spend in a recording session. A value of at least 1 is required. Default is 1.
- Voice Capture On Device – A boolean value which controls whether or not an audio WAV file is available via the Get Captured Audio function after a capture session successfully completes. Default is False.
Capture Screen
The Capture page (Fig. 7) is presented after pressing the capture button on the Home Page. It will begin a capture session with preferences based on the Workflow specified on the Settings page. A combination of Text and Graphics are used to guide the user to gather voice data for liveness detection. The UI elements shown are just examples of what can be done. Application designers can create any UI experience they want using the callback data from the VoiceCapture SDK.
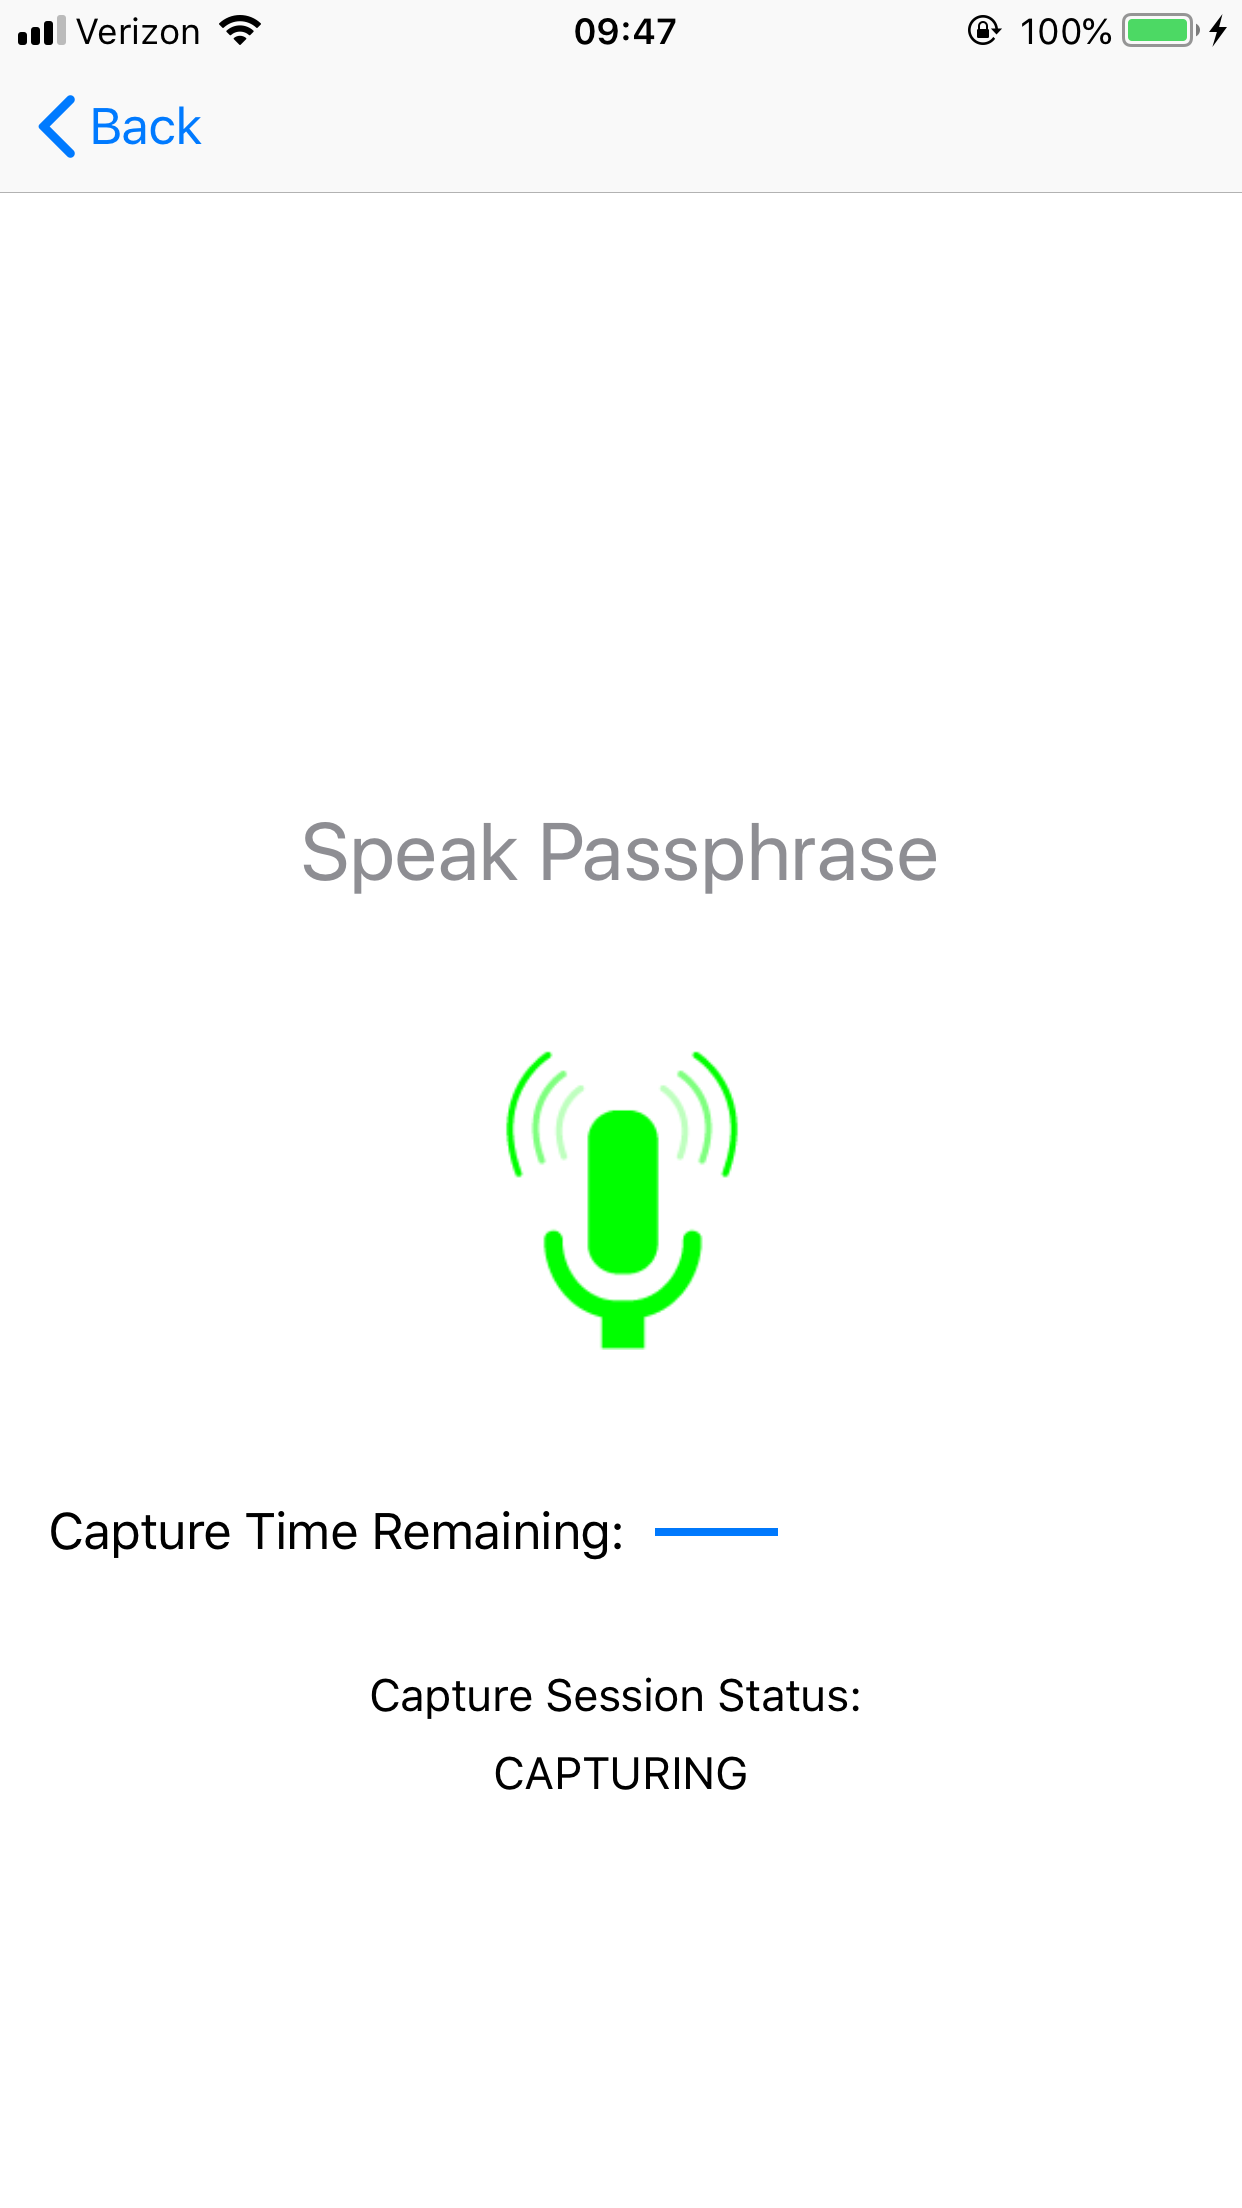
Fig. 7 Capture Page
- Progress Indicator: The progress indicator shows the amount of time left before a capture timeout occurs as specified on the Settings page.
Result Screen
The Result page (Fig. 8) is presented after the voice capture has completed and an answers is received from the server. The UI elements shown are just examples of what can be done. Application designers can create any UI experience they want using the returned json from the VoiceCapture back-end.
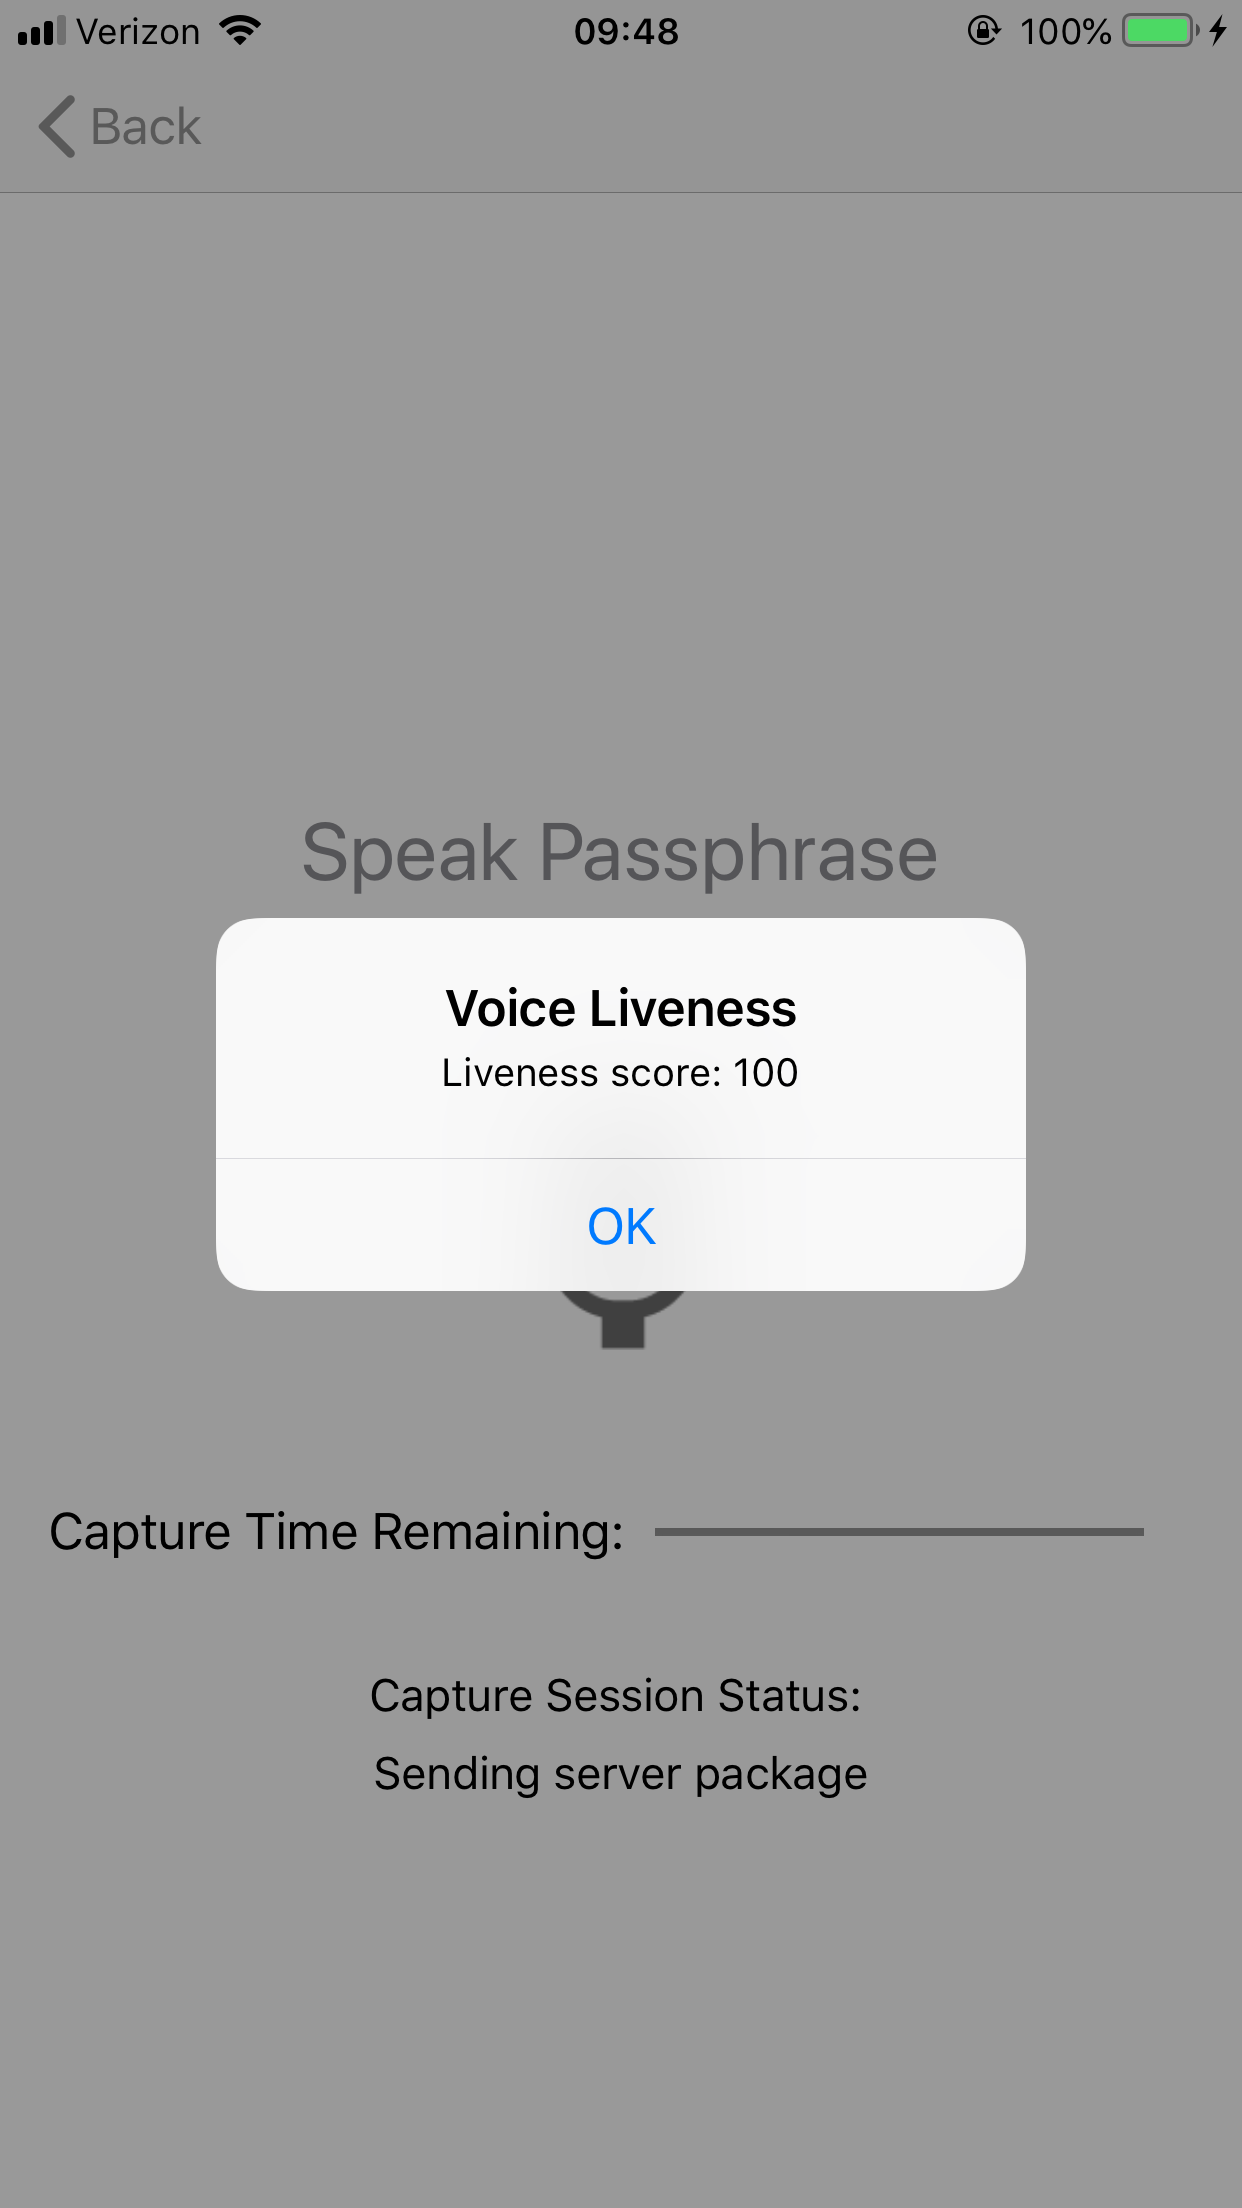
Fig. 8 Result Page
- Result Dialog: The result dialog shows the result of the liveness decision from the server. A score of 100.0 = Live, a score of 0.0 = Spoof.
Demo Code
This section provides details regarding the the VoiceCapture API and how it is used to implement an application.
The iOS VoiceCapture demo program is designed in a way such that the interaction with the AwVoiceCaptureFramework library is encapsulated in the VoiceCapture class.
Create a Voice Capture library
The first step is to create a library object. This is done by creating a VoiceCapture object.
   // Create a voice capture object.
   var voiceCapture : VoiceCapture!

   do {
       voiceCapture = try VoiceCapture()
   }
   catch let err {
       print("Error: " + err.localizedDescription)
   }
Register a Capture Session Status Callback
VoiceCapture library is designed arround the concept of a capture session. This is a session in which voice samples are collected. During the collection process the application needs to listen for status updates from VoiceCapture via a CaptureSessionStatus callback. The application needs to register a class as the listener for this callback. Setting the status callback is done using the API call setCaptureSessionStatusCallback.
   var voiceCapture : VoiceCapture!    // created by an earlier call to VoiceCapture()
   var captureSessionStatusCallback : VoiceCapture.CaptureSessionStatusCallback    // defined below

   do {
       try voiceCapture.setCaptureSessionStatusCallback(captureSessionStatusCallback: captureSessionStatusCallback)
   }
   catch let err {
      print("Error: " + err.localizedDescription)
   }
Create a Workflow Object
A workflow object controls the parameters for a capture session.
   var voiceCapture : VoiceCapture!    // created by an earlier call to VoiceCapture()
   var workflow : Workflow!

   do {
       try workflow = voiceCapture.workflowCreate(name: VoiceCapture.ALFA2)
   }
   catch let err {
       print("Error: " + err.localizedDescription)
   }
Adjust Workflow Settings
Change any settings for the workflow object before starting a capture session.
   var voiceCapture : VoiceCapture!    // created by an earlier call to VoiceCapture()
   var workflow : Workflow!            // Created by an earlier call to workflowCreate()

   do {
       try workflow.setPropertyString(property: .USERNAME, value: "user_name");
       try workflow.setPropertyDouble(property: .CAPTURE_TIMEOUT, value: 8.0);
       try workflow.setPropertyDouble(property: .MINIMUM_RECORDING_LENGTH, value: 1.0);
       try workflow.setPropertyBool(property: .CAPTURE_ON_DEVICE, value: false);

       if let microphones = try? voiceCapture.getMicrophoneList() {
           try workflow.setPropertyString(property: .MICROPHONE, value: microphones[0])
       }
   }
   catch let err {
       print("Error: " + err.localizedDescription)
   }
Begin a Capture Session
Once the workflow object has been created and any necessary properties set, it is used to start the capture session. During the capture session the applicaiton will receive status messages via the CaptureSessionStatusCallback as described above.
   var voiceCapture : VoiceCapture!    // created by an earlier call to VoiceCapture()
   var workflow : Workflow!            // Created by an earlier call to workflowCreate()

   do {
       try voiceCapture.startCaptureSession(workflow: workflow)
   }
   catch let err {
       print("Error: " + err.localizedDescription)
   }
Handle Capture Session Statuses
Each of the statuses sent communicated via the CaptureSessionStatusCallback should be handled by the application. The most important statuses to receive are those related to the end of the capture session as they indicate when the application should move forwards.
   var captureSessionStatusCallback : VoiceCapture.CaptureSessionStatusCallback

   captureSessionStatusCallback = { (status: VoiceCapture.CaptureSessionStatus) -> Void in
       print( "[CVC | captureSessionStatusCallback] capture status is now \(status)")

       // ... handle callback here
   }
Capture Session Completion - Retrieve JSON
After receiving the completed message the application can get the resulting JSON by calling getServerPackage. The resulting JSON can be sent to the server to obtain a liveness result.
   var voiceCapture : VoiceCapture!    // created by an earlier call to VoiceCapture()
   var workflow : Workflow!            // Created by an earlier call to workflowCreate()

   var serverPackage : String?

   do {
       serverPackage = try voiceCapture.getServerPackage(workflow: workflow)
   }
   catch let err {
       print("Error: " + err.localizedDescription)
   }
Capture Session Completion - Retrieve Voice Samples
If the capture on device setting was set to true, the getCapturedVoiceRecording function can be called to get retrieve the byte data representing the collected voice samples.
   var voiceCapture : VoiceCapture!    // created by an earlier call to VoiceCapture()
   var workflow : Workflow!            // Created by an earlier call to workflowCreate()

   var voiceRecording : [UInt8]?

   do {
       voiceRecording = try voiceCapture.getCapturedVoiceRecording(workflow: workflow)
   }
   catch let err {
       print("Error: " + err.localizedDescription)
   }