Knomi S Face Demo
Overview
The Knomi S Face SDK comes with a small developer demo that is intended to show how various options work within Knomi. The demo allows developers to rapidly test various combinations of settings to determine what they need to adjust to meet their own application’s requirements. The demo is not intended to resemble a finished product and provides the subject with many options that should not be accessible to an end-user. Source code for the demo is provided within the SDK installer.
Home Page
The home page for the Knomi S Face demo application contains basic information related to current properties and buttons to begin any of the three major Knomi tasks.
Capture – Perform facial capture and liveness detection.
Settings
The Settings page (Fig. 2) allows a developer to select parameters to test with. The options in the demo program are:
Capture Timeout Limit – Adjust the maximum time allowed for a facial capture.
Eye Separation - Adjust the minimum eye separation (in pixels) required for on device captures.
Username – Username/ID used with Nexa|Face and/or for logging in the Knomi Report server.
Workflows – Adjust the currently selected Workflow. See the Workflows chapter for details on each available Workflow.
URL – Specify the Face Liveness back-end to use for processing collected facial data. Note that this is not a property of the Knomi S Face SDK, but a feature of the application for easy testing.
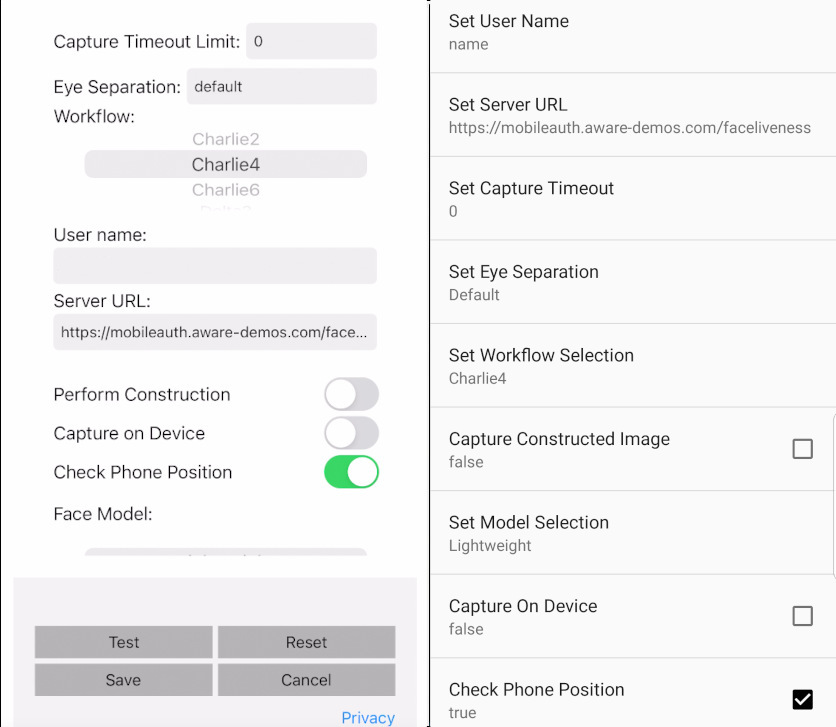
Fig. 2 iOS (left) and Android (right) Configuration Page
Capture Screen
The capture screen is presented after pressing any of the three buttons on the Home Page. It will begin a capture session with preferences based on the Workflow specified on the Settings page. A combination of Text and Graphics are used to guide the user to the optimal position for gathering facial data for liveness detection before performing a final collection. The UI elements shown are just examples of what can be done. Application designers can create any UI experience they want using the callback data from the Knomi S Face SDK.
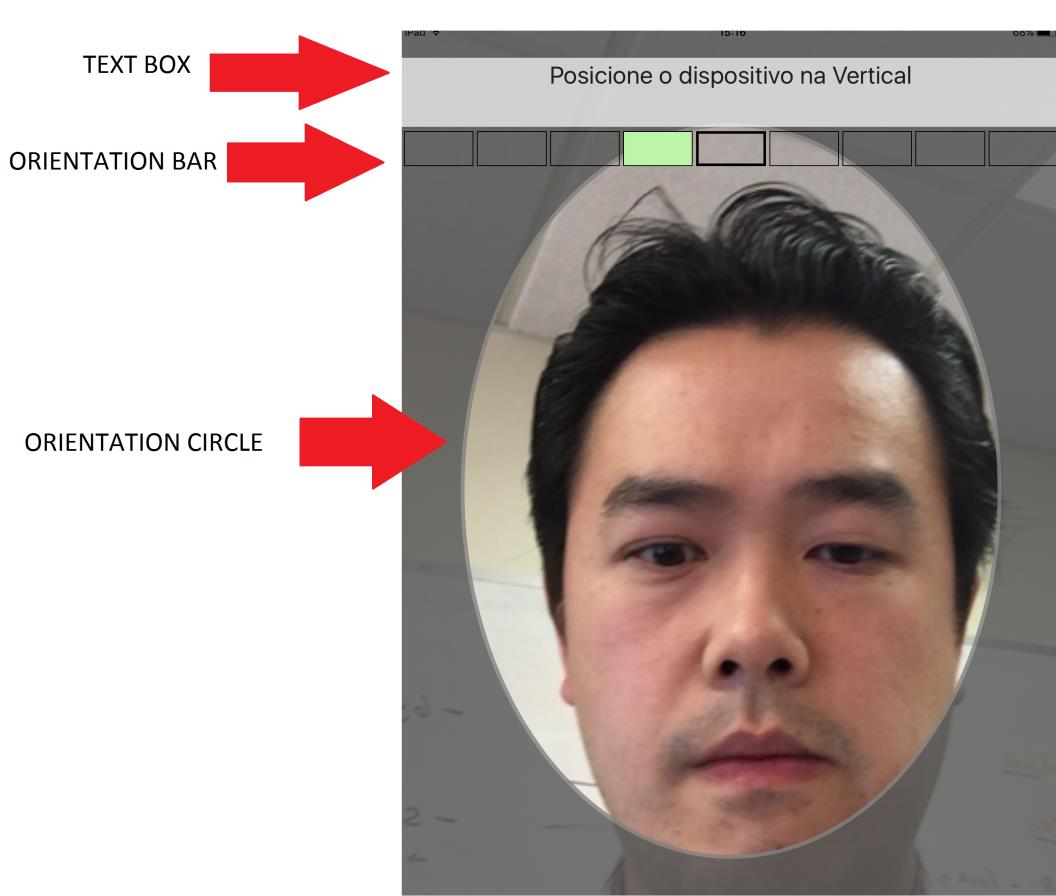
Fig. 3 Interface Description
Text Box: The text box shows messages intended to guide the subject to the correct position and indicate any other potential issues. For a full list of the checks performed by each Workflow please see the Workflows chapter.
Orientation Bar: The orientation bar uses the accelerometer feedback from the Knomi S Face SDK to guide the subject into positioning the phone vertically. When the phone is considered vertical, the middle square will be filled in green. When the phone is not considered to be in position, the box filled in will be off-center based on the data provided from the Knomi S Face SDK. The further from the vertical position the phone is, the box filled in will be further from the center and change color to indicate an issue.
Orientation Circle: The facial outline is a simple silhouette to guide the subject to place their face in a generally centered area. This is based on the region of interest returned from the Knomi S Face SDK.
Once all pieces of the UI are showing green, the subject will be asked to hold still while the facial collection process occurs. During this period, it is especially important that the subject moves themselves and the device as little as possible. After holding still for a short period, the demo will contact the Face Liveness Server back-end specified by the URL in the Settings screen. Upon receiving a response, the demo will show the results received.
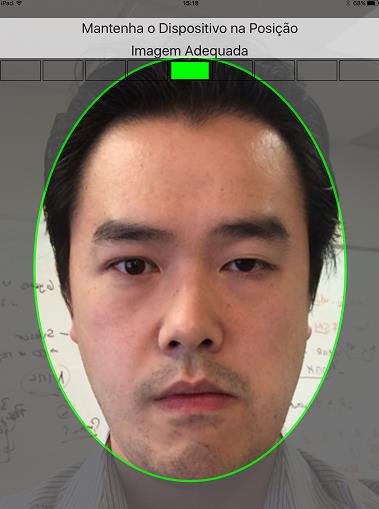
Fig. 4 Interface Description for Ideal Capture
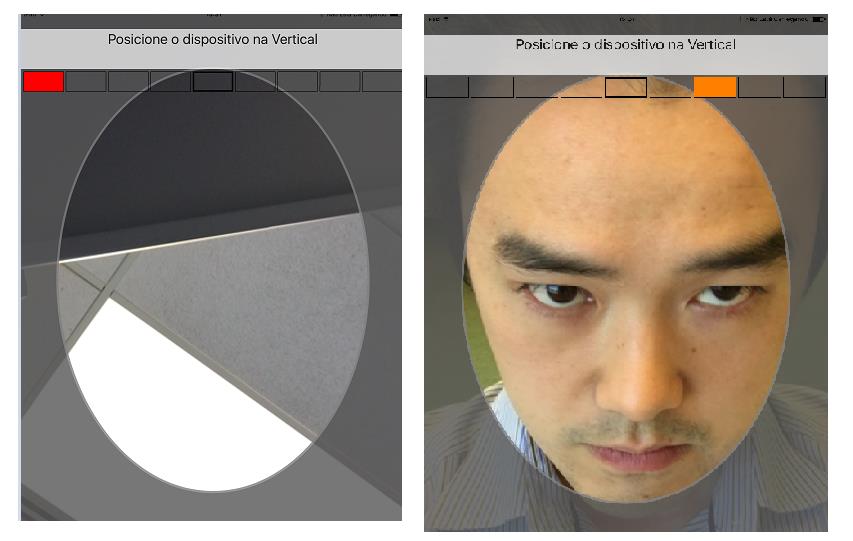
Fig. 5 Interface Description for Non-ideal Capture
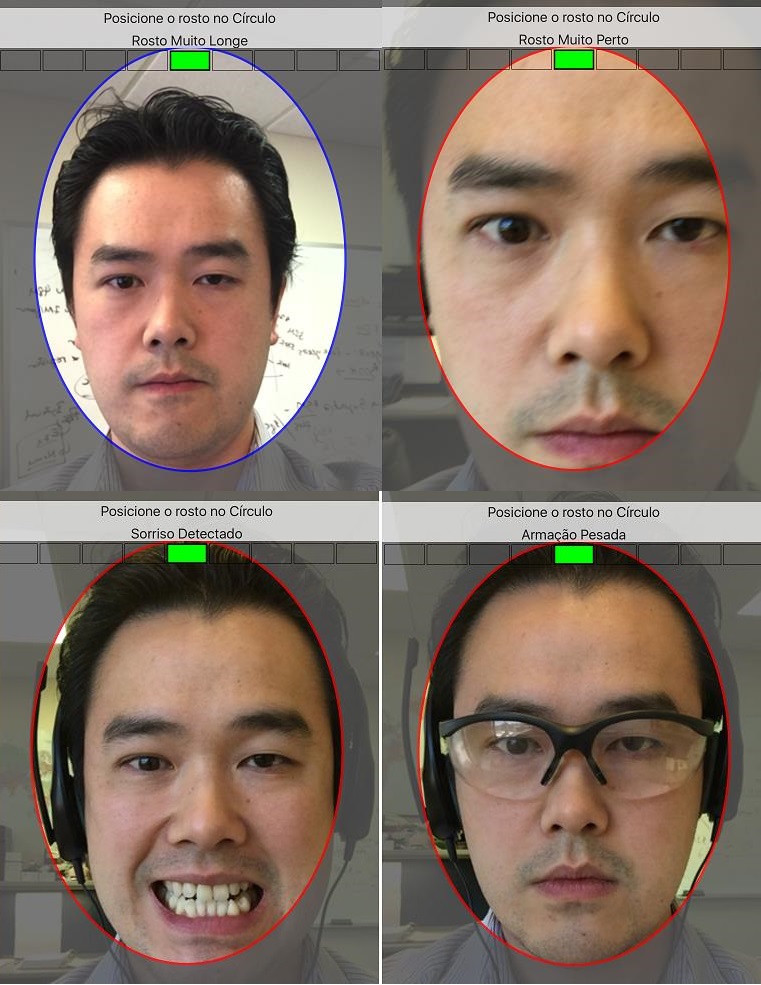
Fig. 6 Interface Description for Not Compliant Face
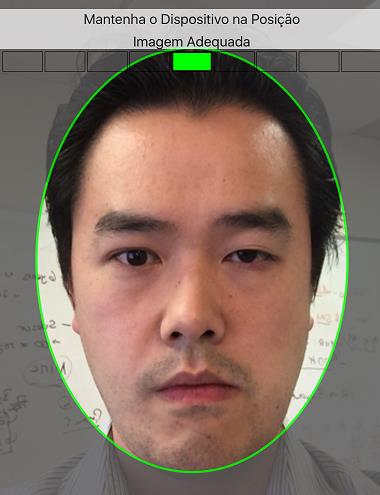
Fig. 7 Ideal Capture Example